Showing posts with label Crafting. Show all posts

Sunday, November 18, 2012

D-I-Y Fall Wreath

If you've been following the Pinterest Party posts you'll know that my friends and I got together and made fall and winter wreaths.  I did a fairly long, wordy, loads of pictures post about what we did, but I did not go into how I made my own personal wreath.  And of course, we have to see if it was budget friendly!

My original idea was to do a fall wreath that centered around sunflowers.  I absolutely love sunflowers and I loved all the examples I had found on Pinterest.

I absolutely loved the reds, yellows, and oranges of all the wreaths, but what I really liked was the letter!  I knew I was going to incorporate that into my own wreath somehow...
I decided to go to Michael's and see what I could find that would live up to my expectations.  The first time I went by myself and bought a vase of fake flowers that were on sale and thought that was all I needed.  But when I went back to help another friend find what she wanted for her wreath, I realized that I wasn't completely happy with the supplies I bought.

Originally I had bought a small wreath from Target for $2.50 and thought that would be sufficient.  I soon realized that such a tiny wreath would look ridiculous on my outside door and I needed something a little bit bigger.

As you can see, the wreath I ended up using could be the little one's mother!  I knew I needed to go bigger.  As they say, bigger is always better.  And while I don't always believe that is true, in this case it was!
I also needed a few smaller flowers to balance out the larger ones as well as a letter.  I also decided that I wanted cranberries wrapped around the wreath because that is something I've always loved.

I used wire to hold my flowers, cranberries, and letter in place.  Some people used hot glue for theirs but I felt like the wire held everything better for me.  I'm very happy with how it turned out!
 

Okay...let's see the cost breakdown:
Grapevine Wreath: $3.00 (originally $5 but I used a 40% off coupon)
Cranberries: $3.00 (Originally $5 but it was on sale for 40% off.  I bought two)
Flowers in vase: $2.60 (original price was $12.99 but I got it at 80% off!)
Other flowers: $5.00
Wire: $0.99
Letter: $1.99

TOTAL: $19.58  

I wanted to try to stay under $20 and I definitely accomplished that!  It is so rewarding knowing that I got a great deal on a lot of the items I used and that I am going to be able to use the wreath for (hopefully) years to come!

Next up, a Christmas wreath!  I'm already planning it out in my head and hope that it turns out just as good as my fall wreath.  Maybe even better!

post signature

Pinterest Party Success!

After a hectic day yesterday it's nice to sit down with my cup of coffee, catch up with a few friends, and settle in for a nice relaxing day at home.  We're exhausted from all of yesterday's excitement  and quite satisfied with the outcome of our crafting skills.  Let's just say that the Pinterest Party was a huge success, and now that I have the first one under my belt I cannot wait to do more!

{You can find my original party post here if you're a little unsure of what a Pinterest party entails}

For my party everyone brought one dish they wanted to try and all the materials to make a fall or winter wreath.  We spent the first hour and a half tasting all of the food and catching up. {Silly me forgot to take pictures of the food!  I guess I was just too busy chowing down!} After our stomachs were satisfied we grabbed our supplies and sat down to craft to our hearts content!  The crafting part of the party probably took about an hour and a half to two hours total.  It was so much fun to see what everyone else was done, and there were a lot of different projects going on!  I think each one reflected the makers personality perfectly, and we're all extremely proud of the outcome!
My sister J did a Christmas wreath with birds on it.  The original picture that she modeled her wreath after, is from Michaels Arts and Crafts store.  It came out so well and is so unique!  S was in love with the birds and I won't be surprised if she goes back to Michael's to make a wreath similar to the one made.  My favorite part of the entire project (beside the birds, which are super cute!) was the snow-in-a-can that used to give the wreath a "wintery" feel.  

I love that K's wreath was completely different than the rest of ours.  She used a styrofoam tube as the base and pinned felt to it to get the look the see in the picture.  It is so unique and fun!  K told us after we were done that using pins to keep the felt in place wore her fingers down during the process though, so if you are thinking of trying this version you may want to get something that will protect your fingers!    
At first, S wanted to do her own version of this wreath, but ended up with a finished product that looked more like a variation of the hydrangea wreath.  There were a few people (myself included) who did different versions of this.  The most unique part about the whole wreath was that S wrapped her letter in ribbon which gave it a completely different effect.  
L and I did different versions of S's wreath (see above).  I love L's wreath because the colors match the theme of her house and not only is it chic, but it is very unique to her taste.  Oh...and the colors are gorgeous of course!
All the ladies with our newly crafted wreaths!
There is one person whose wreath I did not get a picture of in an individual shot, and that is E's (top row, second from the right).  E made hers with coffee filters and the reason I don't have a finished shot is because she is not done with it yet.  Hopefully she will send me a picture with the finished result because I am so anxious to see it!  I absolutely adore the coffee filter idea and love how full her wreath is!  Even if she just put a bow on it I think it would look fantastic!    
Before everyone left I had a small surprise for them.  I wanted to say thank you for coming and to give them all a little momento to remember the day by.


And here are the bags they went in:


Even though I was stressing a bit, the party turned out to be a success and we all had lots of fun!  I am very excited to have left over snacks to eat and new recipes to print out for my recipe binder!

For now, I'll leave you with a few links for some of the food my guests made:
1.  Strawberry Cheesecake Bites: verdict?  A hit!  People gobbled them up.
2.  Moscato Spritzer: verdict?  Okay, not my personal favorite but still pretty good!
3.  Lemonade Punch: verdict?  Delicious!  I will definitely be making this again!
4.  Strawberry-Mint Water: verdict?  Holy cow.  I loved it!  In fact, I'm having a glass right now!
5.  Easy Parmesan Knots: verdict?  The best bread I've ever had.  Seriously!

There were also meatballs, spinach and feta cheese dip, shrimp dip, and blue cheese bread bites!  I'll have to get the recipe for all of those and update this when I do.  Everything was delicious though and my mouth is still watering thinking of all the deliciousness!

I hope you've enjoyed my long picture filled post!  And I also hope that it has inspired you to do some crafting of your own!

post signature

Monday, November 5, 2012

Pinterest Party Projects

I'm having a Pinterest Party!

Yep.  In a few weeks I'll have a few friends over to craft, eat food, and hang out.  I don't know about everyone else, but I am so excited to do this!  In fact, I'm so excited that I've already started making a few preparations that could technically be held off for another week or so (thank you OCD).

If you've never heard of a Pinterest Party before, let me fill you in on all the fun!

The point of the party is to get together and make a (reasonably priced) craft (or two) that you've found on Pinterest.  
At my party we're going to make wreaths!  You can either have your guests go out and buy their own supplies to bring with them, or the host can buy the supplies in advance and have each guest bring money to cover the cost.  This differs depending on whomever is throwing the party, but since everyone that is coming to my party has different styles I decided to have everyone get their own supplies.    

You can also have each guest bring a dish that they've found on Pinterest and have been dying to try (like a potluck!).
I've asked each of my friends to bring a different dish without being too specific (we could either end up with a lot of dessert or none at all!).  I've also asked that they print out directions for the recipe they've made, that way we can give it to someone else to take home if they like it.  OH!  And, if you have food allergies like I do, you can always specifically ask that no one brings a dish that you can't eat.  

That's about all a Pinterest Party entails.  Pretty simple, right?  I've also got a few surprises up my sleeve and will wait until after the party to share them with you!  I don't want to ruin it for the people who are coming.

So far, I've done a few things to get ready for the party that I'd like to share with you.

I'm not much of a e-vite person.  I love the old school charm of a handmade (or even a cute store bought) invitation.  There is just something so personal and sweet about someone taking time out of their day to write out a card to you.  That is why I decided to make my own Pinterest invites!

I wanted them to look as much like the Pinterest logo as I could, so I pulled out my cricut, plugged it in, and got to work.  Here is what I came up with:


I also made this super awesome printable using Photoshop.  I'm starting to get really good at just bs'ing my way through using it and making stuff look good.


And that is it for now!  Stay tuned for some more fun projects that I'll be starting for the party and check back in a few weeks to find out how it went!

As always, you can find the downloadable version of the above printable on my google site.  It will print up to an 8x10!

Happy crafting!  

Monday, October 1, 2012

How I Spend My Monday Nights

I just wanted to share a few pictures of some cards I made tonight.  This is how I pass the time when Chris is playing games on his computer.

They're going to fill in all the empty space in my newly made card box!

All of these cards of versions of pictures I came across on Pinterest:

I think this is my favorite one.  I love the colors and the
idea that it's a shirt is just so cute! 
I'm not really sure what this card is going to be
for, but I just liked the ideas of colored
butterflies on a black piece of paper.
I'm not sure what I'm going to use this card for.  I have an
idea but I think I'll keep it a secret for now...

Homemade Card Storage

Have you ever seen the Friends episode where Monica has the secret closet?  If not you should watch this scene from youtube.  It's hilarious!

I have my own similar not so similar but kind of like the closet situation in that episode.  I call it the "everything-that-I-don't-care-to-find-a-place-for" drawer because things that I don't feel like organizing at a specific time get tossed in there only to be buried and found at a much later date.  It is a little embarrassing to admit that I have one of those drawers, but doesn't everyone?  I guess I should give you a sneak peek into what it looks like...

One item that lives in the drawer that is begging to get out is my homemade cards.  I can never remember what cards I have, what cards I need, and when I need to make more.  So I started to brainstorm on what I could do and how I could find (or make) a new home for my cards.

It was pure luck when I came across the post from Delightful Order.  Not only did it fit all my needs, but it was practical and would be cute to display around the house!  Perfection!

Lucky for me, my best friends mom gave me the exact same box that DaNita from Delightful Order used for this project.  I have been struggling since March to figure out what I wanted to do with the box and I finally found a great use for it!

The first thing I did was make labels on my computer (thank you powerpoint!).  I sort of borrowed the design from Delightful Order and just changed the colors to match the color palette I wanted.  After they were printed I waited about fifteen minutes just to make sure the ink was dry and then laminated the labels.  I used some laminating paper that I bought months ago at Target then cut out the individual labels into squares.  I also made dividers out of regular colored card stock and a birthday reminder sheet to glue to the top of the box.

After looking at the labels I knew I didn't like the square design they had.  I wanted something a little different and I was falling in love with the scalloped look from Delightful Order's labels.  Since I didn't have a scalloped punch I tried using my cricut but that was a complete disaster.  Luckily I had printed out another copy of all the labels so I was able to see if the scalloped cut worked without ruining my newly laminated labels.
(I did not take a picture of this step.  I was too busy getting frustrated because plan A was not working out the way I wanted it too) 

Once I bought the scalloped punch I was able to finish my project!  Now all I have to do is make some cards to fill it up!


So what do you think?!  I'm so happy I found a practical and cost effective way to store all of my handmade cards.  The whole project only cost me $5.00!  Chris was pretty happy with it too.  The first thing he asked was whether or not I shared the finished product on my blog.  He knows me so well...

Wednesday, August 8, 2012

A Twist on Old School Friendship Bracelets

Who remembers those super awesome friendship bracelets that were big back in the 90's?  My friends and I used to make them all the time during the summer and I had quite a collection.  And I used to be pretty fast at doing them too.  So when I saw this pin on Pinterest, I thought it would be fun to try!

Chris and I travel a lot and I always hate how my headphones get tangled.  It takes me a least five minutes to unravel the chords which can get frustrating and annoying.   So I was excited to go to Michael's and buy the materials to get started on this project!

What You'll Need:
*Embroidery Floss (I used 27.3 yards for all three of them but had way to much left over!  Also, don't get the satin kind (I got cotton) because it doesn't hold knots!)
*Scissors
*Tape
*Earbuds
* Elmer's Glue or superglue

If you want to see step by step instructions on how to do this, visit this blog.

For now, I'll leave you with the photos from my own project and a few words of wisdom.
-This takes forever!  Especially when you're out of practice.  Only do it for a little bit at a time( I did it in 30 minute intervals) because your hands and back will start to cramp up!
-I decided to do my own interpretation of ombre.  I used three different colors but you can buy floss that fades in color as it goes on.
-Use lots of tape to hold everything in place!


Here are all my supplies (minus the superglue)!
It's much easier to roll the floss so it won't tangle while you're knotting it over the earbuds.
The finished project!  

Monday, June 25, 2012

Honeymoon Keepsake

When Chris and I were on our honeymoon in St. Thomas, I had suggested we bring back some sand with us for a little craft project I had in mind.  We filled up one gallon sized ziploc bag and two small sandwich size bags as well.  I wasn't sure how much I would need and decided I'd rather have too much than not enough.  I ended up having way to much but that's okay.  My project ended up working out better than expected and that's all that matters!

Here is what I did:  

I shopped around for a glass jar in my house (I have tons!) to put the sand in.
The cotton balls were moved to a new (smaller) jar

Then, I got on the computer and cropped, re-sized, and did some fun effects on a few of my favorite photos from our honeymoon.
My favorite is the bottom right photo that is a smaller version of the sunset photo up top.  It is supposed to look like a postage stamp that says, "Greetings from St. Thomas!" on the top and the bottom says, "US Virgin Islands."  

After that, I poured the sand in the jar and began to arrange the photos and seashells the way I wanted.

Finally, I had this finished product!

I'd still like to put some twine around the top and make a little tag with my cricut that says where we went, the date, and what the occasion was.  That'll probably happen later this week.

So, what do you think?  Isn't this such a cute way to make a keepsake from all your vacations?  I have to say, I'm in love.


Thursday, May 10, 2012

Cute Wall Art

I got bit by the project bug again this morning and decided to start something I had planned to do back in January.  I got the idea from Pinterest and couldn't wait to do it for our home, but I was in the midst of wedding planning so a few things had to go on the back burner.  Now that I'm done with all the craziness, I can finally relax and do some fun home updating!

One of my favorite things to do is make wall art or frame my photographs to put on the walls.  Nothing makes a house feel more like a home than personal photographs and I always hang my best ones.  I love when people come over and ask where a photo was taken, or who made that particular piece of art.  So...I decided to make another conversation starter.

For this project you'll need:
  1. A cricut to cut out shapes.  Or have a fabulous ability to cut out perfect hearts every single time.
  2. A tape measure.  I found that easier to use because the frame was so long.
  3. Cardboard (colored or not, your choice), card stock (any color you want), and a cutting board.
  4. A printer and glossy printer paper.  Oh yea, and plenty of ink!  :-)
  5. A cute picture frame.
  6. Scissors and regular tape (two sided is best).
  7. And last but not least; good, legible handwriting!  A printer may come in handy here too.  
Step 1:  I used my cricut (Tie the Knot Cartridge) to cut out a heart.  You may have to resize it (the heart) a few different times until you get exactly what size you need.  I probably could've gone a little smaller but this size (6, I believe) worked just fine!

Step 2:  I gathered the supplies I needed:  A white poster board from Michaels, cardboard, and my tools, which included my tape measure).

Step 3:  I got the frame I wanted to use and measured it horizontally (26 inches) and vertically (10 inches).  
The frame is from Target!

Step 4:  I measured out the center of the page, as well as where the hearts should go.  Then I used my orange heart from Step 1 and traced it on the paper!
I used such a bright color because it was easy to trace!

Step 5:  I cut out the three hearts to get ready for the maps!  (I feel like this one is self explanatory for humor me please!)  
Please forgive the non-rotated photo.  I have no idea how to fix this and I've tried multiple times!

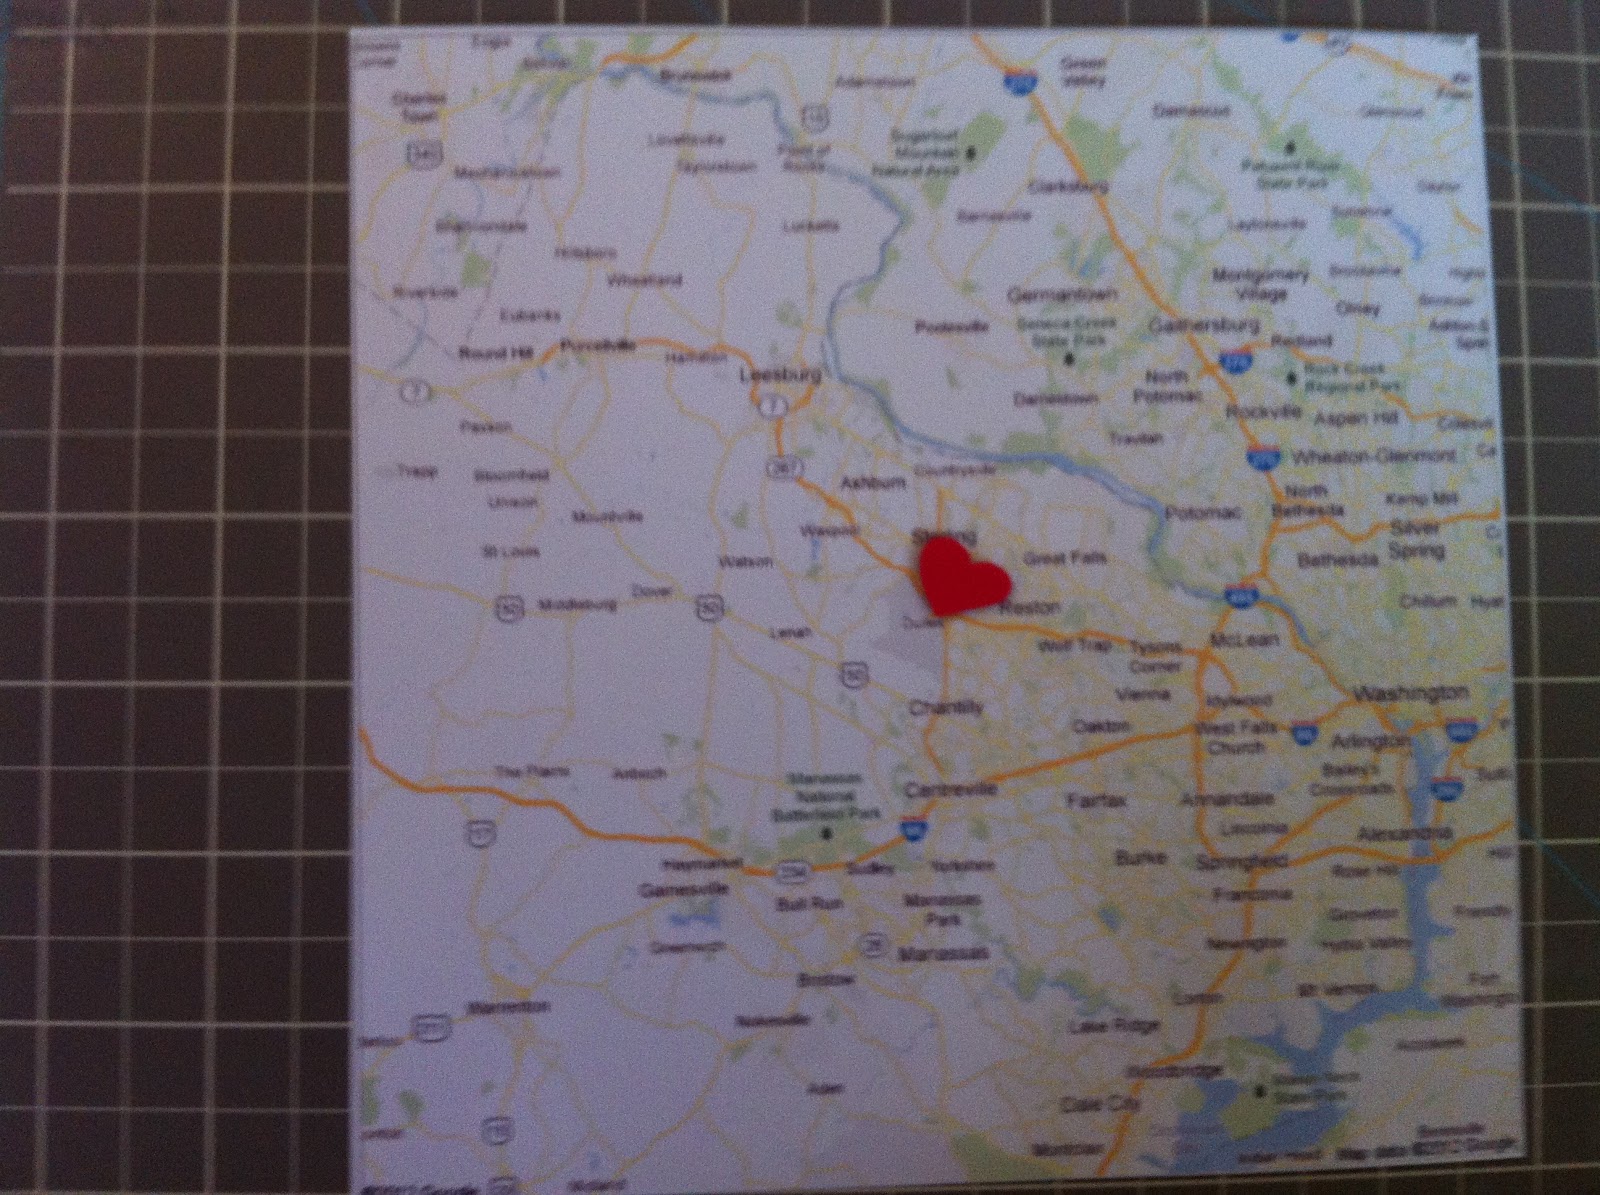
Step 6:  I printed maps off the internet (google maps) onto glossy photo paper and cut off the excess paper.  Then I used my cricut to cut out smaller red hearts.

Step 7:  I put the little red hearts on the exact spot (where we met, got married, and where we live) to draw attention to it.


Step 8:  I cut out small rectangles in blue and white and wrote the description to put under each heart shaped map!  Then, I taped the maps to the back of the cardboard paper, put everything in the frame, and flipped it over.  Hello finished product!
Once again, please forgive the photo!  

This turned out really well and I absolutely love it!  Now, I just need to find a place to hang it.....

Wednesday, May 9, 2012

Family Binder Update

Two posts in one day?  This is absolutely unheard of!  Especially from me.  But, I promised I'd come back and post a few pictures of my ever evolving family binder.  So, here I am!

I actually enjoyed this project.  And my most favorite part of all was putting all 124 DVD titles into my Microsoft Access spreadsheet (and those were only the DVD's we have out at the moment.  We have a lot more packed away).  Doing this made me notice that my collection of "girlie movies" (as Chris and many other men call them) are slowly being consumed by the more "manly" action/adventure movies.  I think I may need to up my monthly movie budget by a little bit and start collecting some of my favorites!  Don't get me wrong, I am definitely an action movie kind of gal, but I love my romance movies.  Especially on a cold rainy day!

Wow, that was a little off topic.  :-)

I guess you could say I'm a list maker.  Yep, I love my lists.  Whenever we go on a trip I make a list a few days in advance of all the things we're going to need and then double and triple check I've crossed everything off before we finally walk out of the door.  That's why, I  was very happy (ridiculously so) when my oldest sister gave me a travel checklist for Christmas.

If you don't have one...I suggest getting it.  It's awesome!
Lucky for me, this little dodad saved me some time today since I didn't have to make my own custom pack list for my binder!  However, I could easily customize one so that I know exactly what I need to take with me on trips!  Instead, I sat in front of my computer and typed up a few different lists.

I am super proud of my DVD list.  Notice that they're categorized by Blu-Ray, Standard, and Standard/Blu-Ray TV Shows.  Hmm...that probably sounds a bit geeky...

To the left is the list of the doctor's we go to,  hours of operation, phone numbers, etc.  On the right is a list of our allergies.  There's plenty of space so it can be updated along the way if I need to!

This little paper is going to come in handy so we can remember the special events in our families lives!  I'm hoping to never forget another anniversary or birthday with these babies!

I already had an address book that I made on Microsoft Access (it was a school project that has definitely come in handy!) so that was able to be crossed off my list (yay!).  I highly suggest using Microsoft Word or Access to do most of this stuff.  I still need to do an automobile maintenance checklist but I figure I'm in no rush.  I also didn't decorate my papers because (1) I didn't want to waste ink and (2) I don't really see the need!  I'll get a cute decorative binder from Target to make it look more snazzy!

Family Binder

A little over a year ago I read a post by a favorite blogger Jen over at iheartorganizing about the idea of a family binder.  She had come up with a simple and convenient way to keep all of her families important documents and information in one place, and I loved that idea.  I'm pretty positive that Chris could care less where everything is in the house because he is one of those people who likes an organized mess (is there really such a thing?!), so I took it upon myself to work on this project!

I had already started a binder about the time I read the original post but I never finished it.  I'm the type of gal that likes to start something and then come back to it months later with a disappointed look on her face because it wasn't done right the first time.  *sigh*  I guess I need to up my motivational drive somehow....suggestions?  :-)  Anywho, my friend Amy recently posted on her blog about the binder she made for her growing family which, coincidentally, gave me the drive to get off my butt and work on my own binder!  There's nothing like the push from a friend!  (Thanks Amy!)

I went back to Jen's original post to see what all she had put in her binder as well as what Amy did in hers to see where I needed to start over!  I found this helpful post that had lists of categories that anyone could use!  Here is what my list looked like:
  1. Movie Inventory
  2. Cleaning Checklist
  3. Important Contact Numbers
  4. Travel Checklist
  5. Idea/To-Do List
  6. Home Inspiration/Paint and Fabric Swatches etc.
  7. Credit Card and ID Information
  8. Calendar
  9. Medical Information
  10. Insurance Information (Medical, Car, etc)
  11. Auto Maintenance Log
  12. Allergies
  13. List of Family Birthdays and Phone Numbers
Everything in purple is what I want (at this moment) in my binder and the blue is what I will add later on.  I can already see Chris rolling his eyes at the movie inventory portion, but I've always been uber picky (not the word he'd use though!) about my DVD's and the way they are organized.  I may have a few OCD tendencies....  

Anyways.  The next step is to further compress the list into better (more productive) categories.  Here is what I'm thinking at the moment:
  1. Personal Information 
    1. Our marriage license
    2. Birth Certificates
    3. Passports
    4. Contact Information (work numbers, address, etc)
  2. Medical  
    1. List of Allergies
    2. Doctor Information 
  3. Address Book
    1. Including Family Birthdays!
  4. Auto Maintenance Log
  5. Insurance Information
As always, this could change.   I mean, I am a woman and therefore am able to change my mind....right? 

One more thing I should point out is that this binder will be able to grow with you and your family.  Good thing too since we're always growing and changing!  You can add and take out whatever you need, whenever you want.  I also suggest using page protectors so you don't have to constantly use the printer for new pages (ahh...the saver in me is so happy with this idea!) and nice colored dry-erase markers to write with!  As always, happy crafting!  :-)